$ terraform plan Refreshing Terraform state in-memory prior to plan... The refreshed state will be used to calculate this plan, but will not be persisted to local or remote state storage.
An execution plan has been generated and is shown below. Resource actions are indicated with the following symbols: ~ update in-place -/+ destroy and then create replacement
Terraform will perform the following actions:
# ucloud_instance.web[1] must be replaced -/+ resource "ucloud_instance""web" { ~ auto_renew = true -> (known after apply) ~ availability_zone = "cn-bj2-04" -> "cn-bj2-03"# forces replacement ~ boot_disk_size = 20 -> (known after apply) ~ boot_disk_type = "local_normal" -> (known after apply) charge_type = "dynamic" ~ cpu = 1 -> (known after apply) ~ cpu_platform = "Intel/Broadwell" -> (known after apply) ~ create_time = "2020-11-28T23:09:04+08:00" -> (known after apply) + data_disk_size = (known after apply) + data_disk_type = (known after apply) ~ disk_set = [ - { - id = "df06380a-00e1-42df-8c07-eec67d817f97" - is_boot = true - size = 20 - type = "local_normal" }, ] -> (known after apply) ~ expire_time = "2020-11-29T00:09:06+08:00" -> (known after apply) ~ id = "uhost-td3x545p" -> (known after apply) ~ image_id = "uimage-dhe5m2" -> "uimage-rkn1v2" instance_type = "n-standard-1" ~ ip_set = [ - { - internet_type = "Private" - ip = "10.9.44.37" }, ] -> (known after apply) + isolation_group = (known after apply) ~ memory = 4 -> (known after apply) ~ name = "cn-bj2-04-0" -> "cn-bj2-03-1" ~ private_ip = "10.9.44.37" -> (known after apply) + remark = (known after apply) ~ root_password = (sensitive value) ~ security_group = "firewall-juhsrlvr" -> (known after apply) ~ status = "Running" -> (known after apply) ~ subnet_id = "subnet-dtu3dgpr" -> (known after apply) tag = "Default" ~ vpc_id = "uvnet-f1c3jq2b" -> (known after apply) }
Note: You didn't specify an "-out" parameter to save this plan, so Terraform can't guarantee that exactly these actions will be performed if "terraform apply" is subsequently run.
$ terraform plan Refreshing Terraform state in-memory prior to plan... The refreshed state will be used to calculate this plan, but will not be persisted to local or remote state storage.
Note: You didn't specify an "-out" parameter to save this plan, so Terraform can't guarantee that exactly these actions will be performed if "terraform apply" is subsequently run.
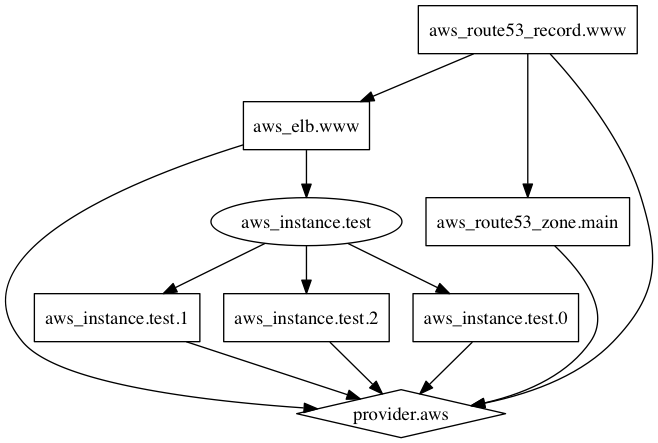
resource "null_resource" "cluster" { # Changes to any instance of the cluster requires re-provisioning triggers = { cluster_instance_ids = "${join(",", aws_instance.cluster.*.id)}" }
# Bootstrap script can run on any instance of the cluster # So we just choose the first in this case connection { host = "${element(aws_instance.cluster.*.public_ip, 0)}" }
provisioner "remote-exec" { # Bootstrap script called with private_ip of each node in the clutser inline = [ "bootstrap-cluster.sh ${join(" ", aws_instance.cluster.*.private_ip)}", ] } }
这个例子里,我们需要所有 AWS 主机的内网 IP 参与才能够成功初始化集群,可能是类似 Kafka 或是 RabbitMQ 这样的应用,我们需要把集群节点的IP写入配置文件。如何确保未来机器数量发生调整以后,机器上的配置文件始终能够获得完整的集群内网 IP 信息,这里使用 triggers 就可以轻松完成目标。
另外在绝大多数生产环境中,服务器都不允许拥有独立的公网 IP,或是禁止从服务器对外服务的公网 IP 直接连接 ssh。这时一般我们会在集群中配置一台堡垒机,通过堡垒机进行跳转连接。可以访问通过堡垒机使用SSH的官方文档获取详细信息,在此不再赘述。
| Error: Invalid reference from destroy provisioner │ │ Destroy-time provisioners and their connection configurations may only reference attributes of the related resource, via 'self', 'count.index', or 'each.key'. │ │ References to other resources during the destroy phase can cause dependency cycles and interact poorly with create_before_destroy.
Terraform used the selected providers to generate the following execution plan. Resource actions are indicated with the following symbols: + create
Terraform will perform the following actions:
# module.vpc.ucloud_subnet.subnet will be created + resource "ucloud_subnet" "subnet" { + cidr_block = "10.0.0.0/24" + create_time = (known after apply) + id = (known after apply) + name = (known after apply) + remark = (known after apply) + tag = "Default" + vpc_id = (known after apply) }
# module.vpc.ucloud_vpc.vpc[0] will be created + resource "ucloud_vpc" "vpc" { + cidr_blocks = [ + "10.0.0.0/16", ] + create_time = (known after apply) + id = (known after apply) + name = "vpc" + network_info = (known after apply) + remark = (known after apply) + tag = "Default" + update_time = (known after apply) }
╷ │ Error: Invalid count argument │ │ on vpc/main.tf line 16, in resource "ucloud_vpc" "vpc": │ 16: count = var.vpc_id == null ? 1 : 0 │ │ The "count" value depends on resource attributes that cannot be determined until apply, so Terraform cannot predict how many instances will be created. To work around this, │ use the -target argument to first apply only the resources that the count depends on. ╵
Terraform 试图向我们抱怨,我们在 count 参数的表达式里使用了一个必须在 apply 阶段才能知道的值,所以它无法在 plan 阶段就计算出 count 的值。它建议我们先用 terraform apply 命令搭配 -target 参数把 Vpc 先创建出来,消除后续计算 Plan 时尚不知晓的值来解决这个问题。
# ucloud_vpc.vpc will be created + resource "ucloud_vpc" "vpc" { + cidr_blocks = [ + "10.0.0.0/16", ] + create_time = (known after apply) + id = (known after apply) + name = "vpc" + network_info = (known after apply) + remark = (known after apply) + tag = "Default" + update_time = (known after apply) }
# module.vpc.ucloud_subnet.subnet will be created + resource "ucloud_subnet" "subnet" { + cidr_block = "10.0.0.0/24" + create_time = (known after apply) + id = (known after apply) + name = (known after apply) + remark = (known after apply) + tag = "Default" + vpc_id = (known after apply) }
Plan: 2 to add, 0 to change, 0 to destroy.
成功计算出 Plan。请注意虽然这个 Plan 仍然是创建两个资源,但 ucloud_vpc 资源并不是 Module 创建的。
这个方法的原理就是虽然 var.vpc.id 仍然是一个只有在 apply 阶段才能知道的值,但 var.vpc 本身是一个在 plan 阶段就可以知道的值,直接可以判读它是否为 null,所以该方法可以绕过这个限制。
│ Error: deleting Public Ip Address: (Name "azurelb" / Resource Group "example"): network.PublicIPAddressesClient#Delete: Failure sending request: StatusCode=400 -- Original Error: Code="PublicIPAddressCannotBeDeleted" Message="Public IP address /subscriptions/subscription-id/resourceGroups/resource-group/providers/Microsoft.Network/publicIPAddresses/one can not be deleted since it is still allocated to resource /subscriptions/subscription-id/resourceGroups/resource-group/providers/Microsoft.Network/loadBalancers/azurelb/frontendIPConfigurations/one. In order to delete the public IP, disassociate/detach the Public IP address from the resource. To learn how to do this, see aka.ms/deletepublicip." Details=[]
$ ls -lah /usr/lib/custom-terraform-plugins -rwxrwxr-x 1 user user 84M Jun 13 15:13 terraform-provider-aws-v1.0.0-x3 -rwxrwxr-x 1 user user 84M Jun 13 15:15 terraform-provider-rundeck-v2.3.0-x3 -rwxrwxr-x 1 user user 84M Jun 13 15:15 terraform-provider-mysql-v1.2.0-x3
# The `aws` provider can reference the outputs of the "vault_setup" run block. access_key = run.vault_setup.aws_access_key secret_key = run.vault_setup.aws_secret_key }
run "vault_setup" { module { # This module should only include reference to the Vault provider. Terraform # will automatically work out which providers to supply based on the module # configuration. The tests will error if a run block requires access to a # provider that references outputs from a run block that has not executed. source = "./testing/vault-setup" } }
run "use_aws_provider" { # This run block can then use both the `aws` and `vault` providers, as the # previous run block provided all the data required for the `aws` provider. }
1.8.1.6. module 块
您可以修改特定的 run 块执行的模块。
默认情况下,Terraform 针对正在测试的配置代码,依次执行所有 run 块中设定的命令。Terraform 在您执行 terraform test 命令的目录(或者您用 -chdir 参数指向的目录)内测试配置。每个 run 块也允许用户使用 module 块更改目标配置。
与传统的 module 块不同,测试文件中的 module 块 仅 支持 source 属性和 version 属性。通常通过传统的 module 块提供的其余属性应由 run 块内的替代属性和块提供。
# This run block references an alternate module and is the first run block # to reference this particular alternate module. Therefore, Terraform creates # and populates a new empty state file for this run block.
module { source = "./testing/setup" } }
run "init" {
# This run block does not reference an alternate module, so it uses the main # state file for the configuration under test. As this is the first run block # to reference the main configuration, the previously empty state file now # contains the resources created by this run block.
assert { # In practice we'd do some interesting checks and tests here but the # assertions aren't important for this example. }
# ... more assertions ... }
run "update_setup" {
# We've now re-referenced the setup module, so the state file that was created # for the first "setup" run block will be reused. It will contain any # resources that were created as part of the other run block before this run # block executes and will be updated with any changes made by this run block # after.
module { source = "./testing/setup" }
variables { # In practice, we'd likely make some changes to the module compared to the # first run block here. Otherwise, there would be no point recalling the # module. } }
run "update" {
# As with the "init" run block, we are executing against the main configuration # again. This means we'd load the main state file that was initially populated # by the "init" run block, and any changes made by this "run" block will be # carried forward to any future run blocks that execute against the main # configuration.
# ... updated variables ...
# ... assertions ... }
run "loader" {
# This run block is now referencing our second alternate module so will create # our third and final state file. The other two state files are managing # resources from the main configuration and resources from the setup module. # We are getting a new state file for this run block as the loader module has # not previously been referenced by any run blocks.
module { source = "./testing/loader" } }
模块的清理
在测试文件执行结束时,Terraform 会试图销毁在该测试文件执行过程中创建的每个资源。当 Terraform 加载替代模块时,Terraform 销毁这些对象的顺序很重要。例如,在第一个 模块 示例中,Terraform 不能在 “execute” run 块中创建的对象之前销毁在 “setup” run 块中创建的资源,因为我们在 “setup” 步骤中创建的 S3 桶在包含对象的情况下无法被销毁。
Terraform 按照 run 块的反向顺序销毁资源。在最近的 例子 中,有三个状态文件。一个用于主状态,一个用于 ./testing/loader 模块,还有一个用于 ./testing/setup 模块。由于 ./testing/loader 状态文件最近被最后一个运行块引用,因此首先被销毁。主状态文件将被第二个销毁,因为它被 “update” run 块引用。然后 ./testing/setup 状态文件将被最后销毁。
请注意,前两个 run 块 “setup” 和 “init” 在销毁操作中不做任何事情,因为它们的状态文件被后续的 run 块使用,并且已经被销毁。
terraform state 命令可以用来进行复杂的状态管理操作。随着你对 Terraform 的使用越来越深入,有时候你需要对状态文件进行一些修改。由于我们在状态管理章节中提到过的,状态文件的格式属于 HashiCorp 未公开的私有格式,所以直接修改状态文件是不适合的,我们可以使用 terraform state 命令来执行修改。
该命令含有数个子命令,我们会一一介绍。
1.7.18.1.1. 用法
terraform state <subcommand> [options] [args]
1.7.18.1.2. 远程状态
所有的 state 子命令都可以搭配本地状态文件以及远程状态使用。使用远程状态时读写操作可能用时稍长,因为读写都要通过网络完成。备份文件仍然会被写入本地磁盘。
1.7.18.1.3. 备份
所有会修改状态文件的 terraform state 子命令都会生成备份文件。可以通过 -backup 参数指定备份文件的位置。
$ terraform taint aws_security_group.allow_all The resource aws_security_group.allow_all in the module root has been marked as tainted.
1.7.19.1.4. 标记使用for_each创建的资源的特定实例
1 2
$ terraform taint "module.route_tables.azurerm_route_table.rt[\"DefaultSubnet\"]" The resource module.route_tables.azurerm_route_table.rt["DefaultSubnet"] in the module root has been marked as tainted.
1.7.19.1.5. 标记模块中的资源
1 2
$ terraform taint "module.couchbase.aws_instance.cb_node[9]" Resource instance module.couchbase.aws_instance.cb_node[9] has been marked as tainted.
虽然我们推荐模块深度不要超过1,但是我们仍然可以标记多层模块中的资源:
1 2
$ terraform taint "module.child.module.grandchild.aws_instance.example[2]" Resource instance module.child.module.grandchild.aws_instance.example[2] has been marked as tainted.
$ terraform workspace new example Created and switched to workspace "example"!
You're now on a new, empty workspace. Workspaces isolate their state, so if you run "terraform plan" Terraform will not see any existing state for this configuration.
使用状态文件创建新工作区:
1 2 3 4 5 6
$ terraform workspace new -state=old.terraform.tfstate example Created and switched to workspace "example".
You're now on a new, empty workspace. Workspaces isolate their state, so if you run "terraform plan" Terraform will not see any existing state for this configuration.
The available commands for execution are listed below. The most common, useful commands are shown first, followed by less common or more advanced commands. If you're just getting started with Terraform, stick with the common commands. For the other commands, please read the help and docs before usage. Common commands: apply Builds or changes infrastructure console Interactive console for Terraform interpolations destroy Destroy Terraform-managed infrastructure env Workspace management fmt Rewrites config files to canonical format get Download and install modules for the configuration graph Create a visual graph of Terraform resources import Import existing infrastructure into Terraform init Initialize a Terraform working directory login Obtain and save credentials for a remote host logout Remove locally-stored credentials for a remote host output Read an output from a state file plan Generate and show an execution plan providers Prints a tree of the providers used in the configuration refresh Update local state file against real resources show Inspect Terraform state or plan taint Manually mark a resource for recreation untaint Manually unmark a resource as tainted validate Validates the Terraform files version Prints the Terraform version workspace Workspace management All other commands: 0.12upgrade Rewrites pre-0.12 module source code for v0.12 0.13upgrade Rewrites pre-0.13 module source code for v0.13 debug Debug output management (experimental) force-unlock Manually unlock the terraform state push Obsolete command for Terraform Enterprise legacy (v1) state Advanced state management
Windows 平台上,文件名必须是 terraform.rc,位置必须在相关用户的 %APPDATA% 目录下。这个目录的物理路径取决于 Windows 的版本以及系统配置;在 PowerShell 中查看 $env:APPDATA 可以找到对应的路径
在其他操作系统上,文件名必须是 .terraformrc(注意第一个是 .),位置必须是在相关用户的 HOME 目录
在 Windows 上创建配置文件时,要注意 Windows Explorer 默认隐藏文件扩展名的行为。Terraform 不会把 terraform.rc.txt 文件识别为命令行配置文件,而默认情况下 Windows Explorer 会将它的文件名显示为 terraform.rc (隐藏了扩展名的缘故)。可以在 PowerShell 或命令行中使用 dir 命令来确认文件名。
ID 取决于被导入的资源对象的类型。举例来说,AWS 主机的 ID 格式类似于 i-abcd1234,而 AWS Route53 Zone 的 ID 类似于 Z12ABC4UGMOZ2N,请参考相关 Provider 文档来获取有关 ID 的详细信息。如果不确信的话,可以随便尝试任意 ID。如果 ID 不合法,你会看到一个错误信息。
在 Windows 上使用 Terraform 时,我们建议使用 Windows 命令提示符 (cmd.exe)。当您从 Windows 命令提示符将变量值传递给 Terraform 时,请在参数周围使用双引号 ":
1
terraform plan -var "name=value"
如果我们的预期值还包含双引号,那么您需要用反斜杠转义它们:
1
terraform plan -var "name=va\"lue"
Windows 上的 PowerShell 无法正确地将文字引号传递给外部程序,因此我们不建议您在 Windows 上时将 Terraform 与 PowerShell 结合使用。请改用 Windows 命令提示符。
根据变量的类型约束,声明变量值的语法有所不同。原始类型 string、number 和 bool 对应一个直接的字符串值,除非您的 shell 如上面的示例所示需要,否则不需要添加特殊的标点符号。对于所有其他类型约束,包括 list、map 和 set 类型以及特殊的 any 关键字,您必须编写一个表示该值的有效 Terraform 语言表达式,并附带必要的引用或转义字符以确保它将通过您的 shell 逐字传递到 Terraform。例如,对于 list(string) 类型约束:
1 2 3 4 5
# Unix-style shell terraform plan -var 'name=["a", "b", "c"]' # Windows Command Prompt (do not use PowerShell on Windows) terraform plan -var "name=[\"a\", \"b\", \"c\"]"
# publish_bucket/bucket-and-cloudfront.tf variable "name" {} # this is the input parameter of the module
resource "aws_s3_bucket" "example" { # Because var.name includes each.key in the calling # module block, its value will be different for # each instance of this module. bucket = var.name
# The default "aws" configuration is used for AWS resources in the root # module where no explicit provider instance is selected. provider "aws" { region = "us-west-1" }
# An alternate configuration is also defined for a different # region, using the alias "usw2". provider "aws" { alias = "usw2" region = "us-west-2" }
# An example child module is instantiated with the alternate configuration, # so any AWS resources it defines will use the us-west-2 region. module "example" { source = "./example" providers = { aws = aws.usw2 } }
# Both old and new configuration used "for_each", but the # "small" element was renamed to "tiny". moved { from = aws_instance.b["small"] to = aws_instance.b["tiny"] }
# The old configuration used "count" and the new configuration # uses "for_each", with the following mappings from # index to key: moved { from = aws_instance.c[0] to = aws_instance.c["small"] } moved { from = aws_instance.c[1] to = aws_instance.c["tiny"] }
# The old configuration used "count", and the new configuration # uses neither "count" nor "for_each", and you want to keep # only the object at index 2. moved { from = aws_instance.d[2] to = aws_instance.d }
注意:当我们在原先没有声明 count 的资源上添加 count 时,Terraform 会自动将原先的对象移动到第 0 个位置,除非我们通过一个 moved 块显式声明该资源。然而,我们建议使用 moved 块显式声明资源的移动,使得读者在未来阅读模块的代码时能够更清楚地了解到这些变更。
当 moved 块的两个地址中的至少一个包含实例键时,例如上面例子中的 [2]那样,Terraform 会理解将这两个地址理解为对模块的特定实例的调用而非对模块所有实例的调用。这意味着我们可以使用 moved 块在不同键之间切换来添加或是删除键,该机制可用于 count 和 for_each,或删除模块上的这种声明。
1.6.4.1.6. 将一个模块分割成多个模块
随着模块提供的功能越来越多,最终模块可能变得过大而不得不将之拆分成两个独立的模块。
我们看一下下面的这个例子:
1 2 3 4 5 6 7 8 9 10 11
resource "aws_instance" "a" { # (other resource-type-specific configuration) }
Terraform 使用定义 moved 块的模块实例的地址的地址来解析 moved 块中的相对地址。例如,如果上面的原模块已经是名为 module.original 的子模块,则原模块中对 module.x.aws_instance.a 的引用在根模块中将被解析为 module.original.module.x.aws_instance.a。一个模块只能针对它自身或是它的子模块中的资源声明 moved 块。
Terraform has made some changes to the provider dependency selections recorded in the .terraform.lock.hcl file. Review those changes and commit them to your version control system if they represent changes you intended to make.
Error while installing hashicorp/azurerm v2.1.0: the current package for registry.terraform.io/hashicorp/azurerm 2.1.0 doesn't match any of the checksums previously recorded in the dependency lock file.
在这种情况下,terraform init 的输出将包括对校验和进行签名的密钥的指纹,以及像这样的信息 (signed by a HashiCorp partner, key ID DC9FC6B1FCE47986)。在提交包含签名校验和的锁文件之前,最好先确认我们能够信任给该密钥的持有者,或者检索并验证指定 Provider 版本的所有可用包的集合。
set 和 tuple:当一个 list 或是 tuple 被转换为一个 set,那么重复的值将被丢弃,并且值原有的顺序也将丢失。如果一个 set 被转换到 list 或是 tuple,那么元素将按照以下顺序排列:如果 set 的元素是 string,那么将按照字段顺序排列;其他类型的元素不承诺任何特定的排列顺序。
复杂类型转换时,元素类型将在可能的情况下发生隐式转换,类似上述 list 到 tuple 转换举的例子。
如果类型不匹配,Terraform 会报错,例如我们试图把object({name = ["Kristy", "Claudia", "Mary Anne", "Stacey"], age = 12})转换到 map(string) 类型,这是不合法的,因为 name 的值为 list,无法转换为 string。
1.4.1.1.3. any
any 是 Terraform 中非常特殊的一种类型约束,它本身并非一个类型,而只是一个占位符。每当一个值被赋予一个由 any 约束的复杂类型时,Terraform 会尝试计算出一个最精确的类型来取代 any。
variable "with_optional_attribute" { type = object({ a = string # a required attribute b = optional(string) # an optional attribute c = optional(number, 127) # an optional attribute with default value }) }
variable "image_id" { type = string description = "The id of the machine image (AMI) to use for the server."
validation { condition = length(var.image_id) > 4 && substr(var.image_id, 0, 4) == "ami-" error_message = "The image_id value must be a valid AMI id, starting with \"ami-\"." } }
假如表达式的计算产生一个错误是输入变量验证的一种判定手段,那么可以使用 can 函数来判定表达式的执行是否抛错。例如:
1 2 3 4 5 6 7 8 9 10
variable "image_id" { type = string description = "The id of the machine image (AMI) to use for the server."
validation { # regex(...) fails if it cannot find a match condition = can(regex("^ami-", var.image_id)) error_message = "The image_id value must be a valid AMI id, starting with \"ami-\"." } }
上述例子中,如果输入的 image_id 不符合正则表达式的要求,那么 regex 函数调用会抛出一个错误,这个错误会被 can 函数捕获,输出 false。
Terraform will perform the following actions: # some_resource.a will be created + resource "some_resource" "a" { + name = (sensitive) + address = (sensitive) }
# some_resource.a will be updated in-place ~ resource "some_resource" "a" { ~ nested_block { # At least one attribute in this block is (or was) sensitive, # so its contents will not be displayed. } }
output "instance_ip_addr" { value = aws_instance.server.private_ip description = "The private IP address of the main server instance."
depends_on = [ # Security group rule must be created before this IP address could # actually be used, otherwise the services will be unreachable. aws_security_group_rule.local_access, ] }
紧跟 resource 关键字的是资源类型,在上面的例子里就是 aws_instance。后面是资源的 Local Name,例子里就是 web。Local Name 可以在同一模块内的代码里被用来引用该资源,但类型加 Local Name 的组合在当前模块内必须是唯一的,不同类型的两个资源 Local Name 可以相同。随后的花括号内的内容就是块体,创建资源所用到的各种参数的值就在块体内定义。例子中我们定义了虚拟机所使用的镜像 id 以及虚拟机的尺寸。
资源不但可以通过参数传值,成功创建的资源还对外输出一些通过调用 API 才能获得的只读数据,经常包含了一些我们在实际创建一个资源之前无法获知的数据,比如云主机的 id 等,官方文档将之称为属性(Attribute)。我们可以在同一模块内的代码中引用资源的属性来创建其他资源或是表达式。在表达式中引用资源属性的语法是<RESOURCE TYPE>.<NAME>.<ATTRIBUTE>。
resource "aws_iam_role" "example" { name = "example"
# assume_role_policy is omitted for brevity in this example. See the # documentation for aws_iam_role for a complete example. assume_role_policy = "..." }
resource "aws_iam_instance_profile" "example" { # Because this expression refers to the role, Terraform can infer # automatically that the role must be created first. role = aws_iam_role.example.name }
resource "aws_iam_role_policy" "example" { name = "example" role = aws_iam_role.example.name policy = jsonencode({ "Statement" = [{ # This policy allows software running on the EC2 instance to # access the S3 API. "Action" = "s3:*", "Effect" = "Allow", }], }) }
resource "aws_instance" "example" { ami = "ami-a1b2c3d4" instance_type = "t2.micro"
# Terraform can infer from this that the instance profile must # be created before the EC2 instance. iam_instance_profile = aws_iam_instance_profile.example
# However, if software running in this EC2 instance needs access # to the S3 API in order to boot properly, there is also a "hidden" # dependency on the aws_iam_role_policy that Terraform cannot # automatically infer, so it must be declared explicitly: depends_on = [ aws_iam_role_policy.example, ] }
我们来分段解释一下这个场景,首先我们声明了一个 AWS IAM 角色,将角色绑定在一个主机实例配置文件上:
1 2 3 4 5 6 7 8 9 10 11 12 13
resource "aws_iam_role" "example" { name = "example"
# assume_role_policy is omitted for brevity in this example. See the # documentation for aws_iam_role for a complete example. assume_role_policy = "..." }
resource "aws_iam_instance_profile" "example" { # Because this expression refers to the role, Terraform can infer # automatically that the role must be created first. role = aws_iam_role.example.name }
虚拟机的声明代码中的这个赋值使得 Terraform 能够判断出虚拟机依赖于主机实例配置文件:
1 2 3 4 5 6 7
resource "aws_instance" "example" { ami = "ami-a1b2c3d4" instance_type = "t2.micro"
# Terraform can infer from this that the instance profile must # be created before the EC2 instance. iam_instance_profile = aws_iam_instance_profile.example
至此,Terraform 规划出的创建顺序是 IAM 角色 -> 主机实例配置文件 -> 主机实例。但是我们又为这个 IAM 角色添加了对 S3 存储服务的完全控制权限:
1 2 3 4 5 6 7 8 9 10 11 12
resource "aws_iam_role_policy" "example" { name = "example" role = aws_iam_role.example.name policy = jsonencode({ "Statement" = [{ # This policy allows software running on the EC2 instance to # access the S3 API. "Action" = "s3:*", "Effect" = "Allow", }], }) }
也就是说,虚拟机实例由于绑定了主机实例配置文件,从而在运行时拥有了一个 IAM 角色,而这个 IAM 角色又被赋予了 S3 的权限。但是虚拟机实例的声明代码中并没有引用 S3 权限的任何输出属性,这将导致 Terraform 无法理解他们之间存在依赖关系,进而可能会并行地创建两者,如果虚拟机实例被先创建了出来,内部的程序开始运行时,它所需要的 S3 权限却还没有创建完成,那么就将导致程序运行错误。为了确保虚拟机创建时 S3 权限一定已经存在,我们可以用 depends_on 显式声明它们的依赖关系:
1 2 3 4 5 6 7
# However, if software running in this EC2 instance needs access # to the S3 API in order to boot properly, there is also a "hidden" # dependency on the aws_iam_role_policy that Terraform cannot # automatically infer, so it must be declared explicitly: depends_on = [ aws_iam_role_policy.example, ]
# default configuration provider "google" { region = "us-central1" }
# alternate configuration, whose alias is "europe" provider "google" { alias = "europe" region = "europe-west1" }
resource "google_compute_instance" "example" { # This "provider" meta-argument selects the google provider # configuration whose alias is "europe", rather than the # default configuration. provider = google.europe
lifecycle { ignore_changes = [ # Ignore changes to tags, e.g. because a management agent # updates these based on some ruleset managed elsewhere. tags, ] } }
tags = { # Initial value for Name is overridden by our automatic scheduled # re-tagging process; changes to this are ignored by ignore_changes # below. Name = "placeholder" }
resource "aws_appautoscaling_target" "ecs_target" { # ... lifecycle { replace_triggered_by = [ # Replace `aws_appautoscaling_target` each time this instance of # the `aws_ecs_service` is replaced. aws_ecs_service.svc.id ] } }
lifecycle { # The AMI ID must refer to an existing AMI that has the tag "nomad-server". postcondition { condition = self.tags["Component"] == "nomad-server" error_message = "tags[\"Component\"] must be \"nomad-server\"." } } }
数据源有着与资源一样的依赖机制,我们也可以在 data 块内设置 depends_on 元参数来显式声明依赖关系,在此不再赘述。
注意:在 Terraform 0.12 及更早版本中,由于 data 会将尚不知晓值的读取推迟到 Apply 阶段,因此将 dependent_on 与 data 一起使用将强制将数据的读取推迟到 Apply 阶段,因此,使用 depends_on 的 data 数据源配置永远无法收敛。由于这种行为,我们不建议对 data 使用 depends_on。
1.4.7.1.6. Precondition 与 Postcondition
您可以使用 precondition 和 postcondition 块来指定有关 data 如何运行的假设和验证。以下实力创建一个 postcondition 来检查 AMI 是否具有正确的标签:
1 2 3 4 5 6 7 8 9 10 11
data "aws_ami" "example" { id = var.aws_ami_id
lifecycle { # The AMI ID must refer to an existing AMI that has the tag "nomad-server". postcondition { condition = self.tags["Component"] == "nomad-server" error_message = "tags[\"Component\"] must be \"nomad-server\"." } } }
假设上述例子中的 Terraform 网站是我们即将用同一目录下的 Terraform 代码部署的,在第一次创建 Plan 时因为网站还没有被创建,所以验证会失败,Terraform 总是会在一开始显示一条让人分心的警告信息。
我们可以给该内嵌数据源添加 depends_on 来确保该数据源依赖于某项组成基础设施的必要资源,例如负载均衡器。这样对该数据源的检查结果将保持 known after apply 直到依赖项创建完成。该策略避免了在配置阶段产生无意义的警告信息,直到在 plan 和 apply 操作的合适阶段执行检查。
该策略的一个问题是如果有限作用域数据源所依赖的资源发生了变化,那么 check 块将返回 known after apply 直到 Terraform 完成了对被依赖资源的更新。在某些情况下,这种行为将会引发一些问题。
$ consul Usage: consul [--version] [--help] <command> [<args>]
Available commands are: acl Interact with Consul's ACLs agent Runs a Consul agent catalog Interact with the catalog config Interact with Consul's Centralized Configurations connect Interact with Consul Connect debug Records a debugging archive for operators event Fire a new event exec Executes a command on Consul nodes force-leave Forces a member of the cluster to enter the "left" state info Provides debugging information for operators. intention Interact with Connect service intentions join Tell Consul agent to join cluster keygen Generates a new encryption key keyring Manages gossip layer encryption keys kv Interact with the key-value store leave Gracefully leaves the Consul cluster and shuts down lock Execute a command holding a lock login Login to Consul using an auth method logout Destroy a Consul token created with login maint Controls node or service maintenance mode members Lists the members of a Consul cluster monitor Stream logs from a Consul agent operator Provides cluster-level tools for Consul operators peering Create and manage peering connections between Consul clusters reload Triggers the agent to reload configuration files resource Interact with Consul's resources rtt Estimates network round trip time between nodes services Interact with services snapshot Saves, restores and inspects snapshots of Consul server state tls Builtin helpers for creating CAs and certificates troubleshoot CLI tools for troubleshooting Consul service mesh validate Validate config files/directories version Prints the Consul version watch Watch for changes in Consul
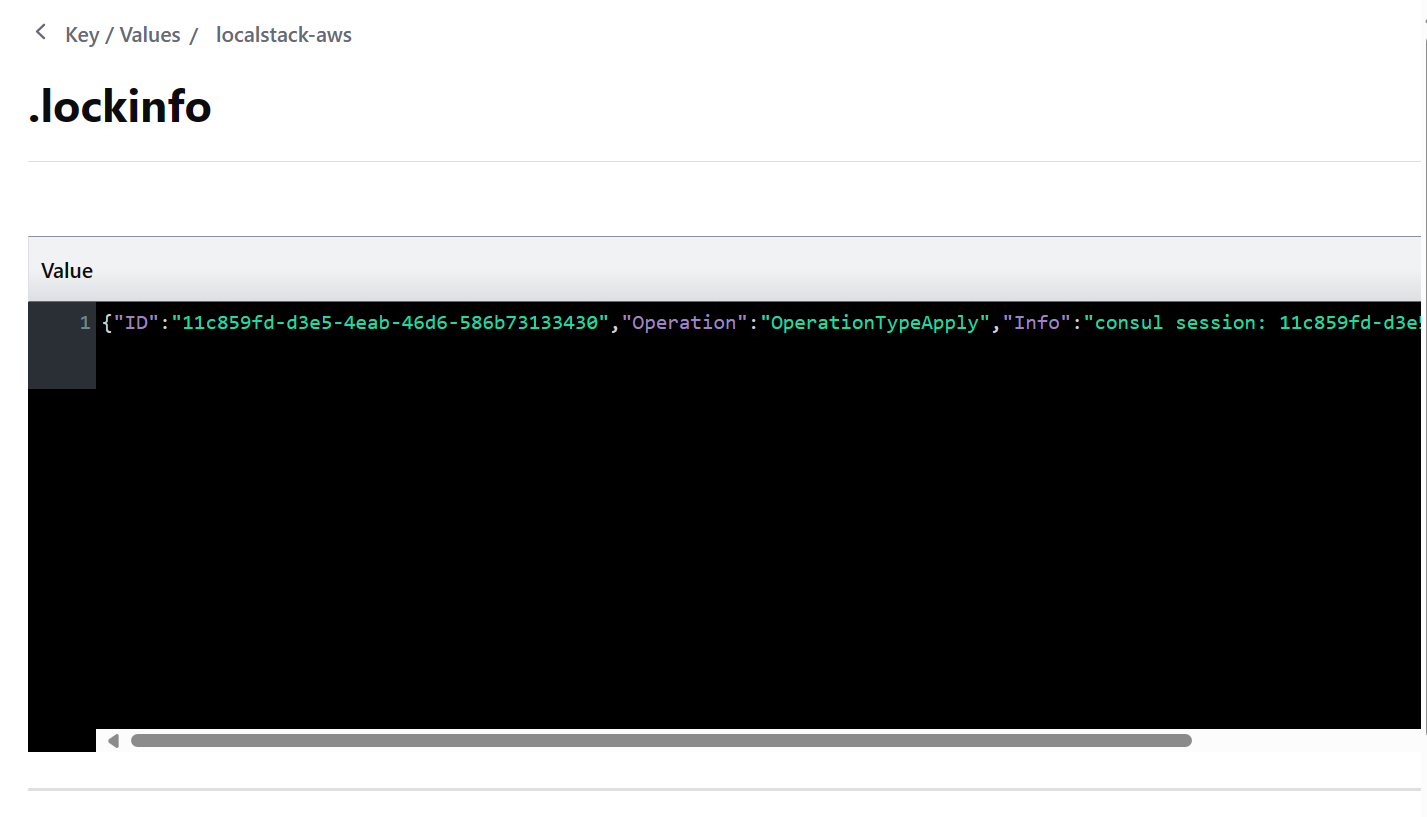
$ terraform apply Acquiring state lock. This may take a few moments... ╷ │ Error: Error acquiring the state lock │ │ Error message: Lock Info: │ ID: 11c859fd-d3e5-4eab-46d6-586b73133430 │ Path: localstack-aws │ Operation: OperationTypeApply │ Who: *** │ Version: 1.7.3 │ Created: 2024-02-25 02:00:21.3700184 +0000 UTC │ Info: consul session: 11c859fd-d3e5-4eab-46d6-586b73133430 │ │ │ Terraform acquires a state lock to protect the state from being written │ by multiple users at the same time. Please resolve the issue above and try │ again. For most commands, you can disable locking with the "-lock=false" │ flag, but this is not recommended. ╵
$ terraform force-unlock 11c859fd-d3e5-4eab-46d6-586b73133430 Do you really want to force-unlock? Terraform will remove the lock on the remote state. This will allow local Terraform commands to modify this state, even though it may still be in use. Only 'yes' will be accepted to confirm.
Enter a value: yes
Terraform state has been successfully unlocked!
The state has been unlocked, and Terraform commands should now be able to obtain a new lock on the remote state.
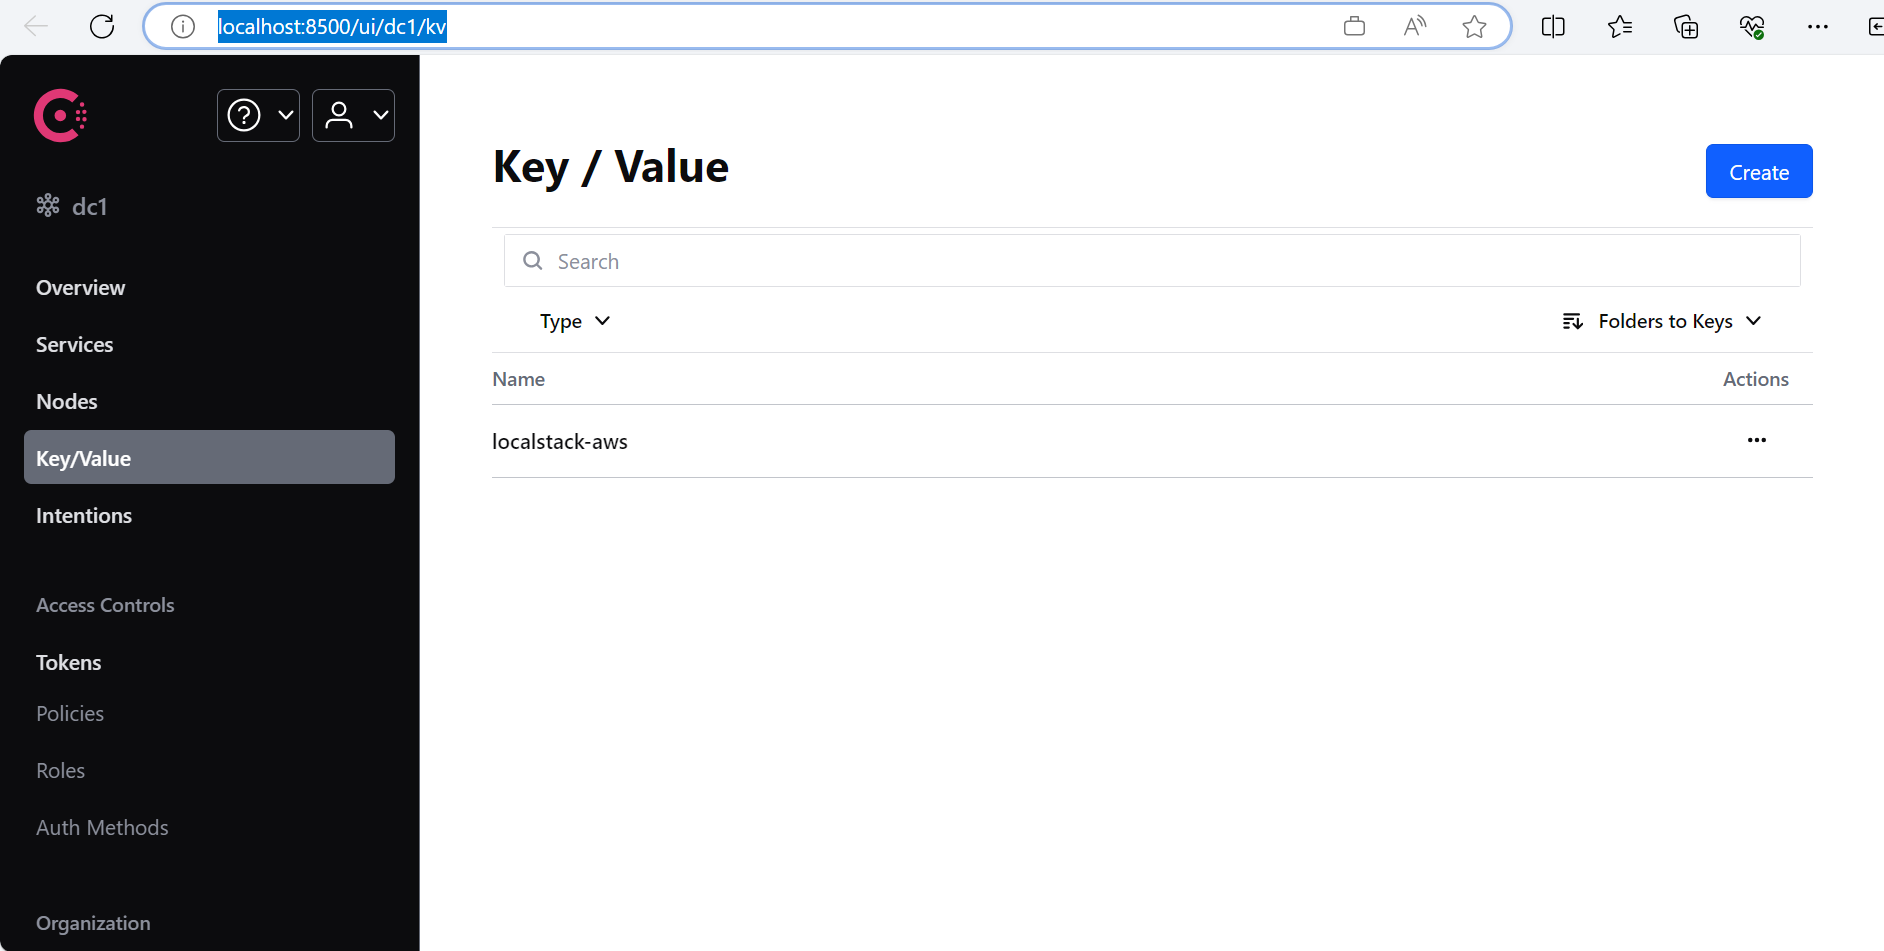
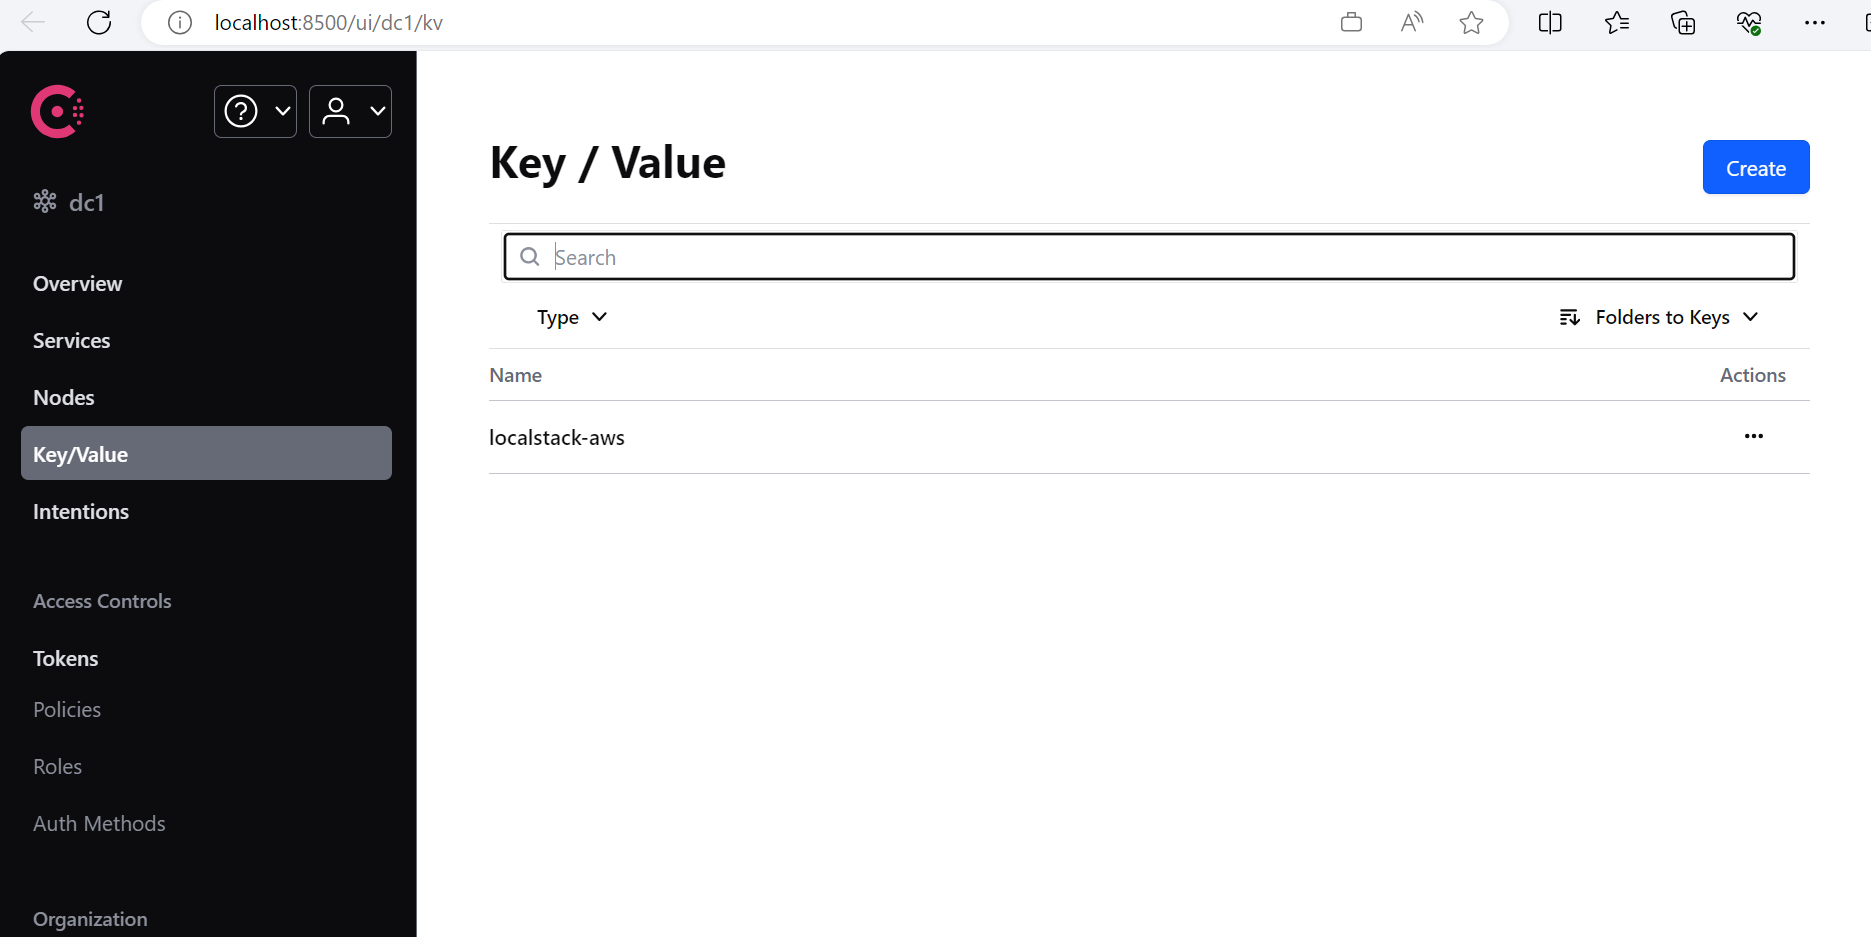
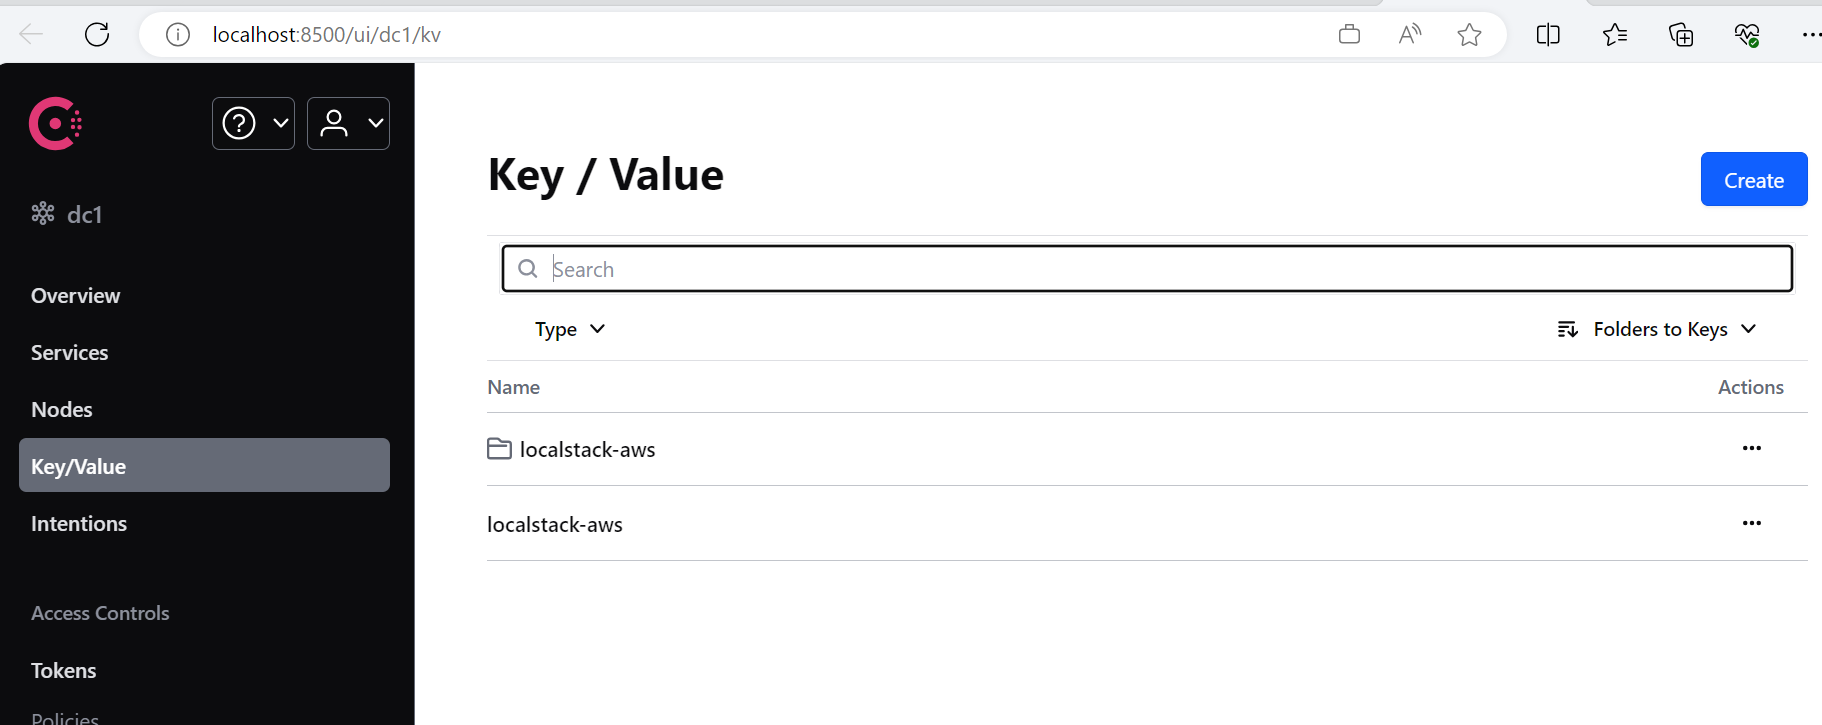
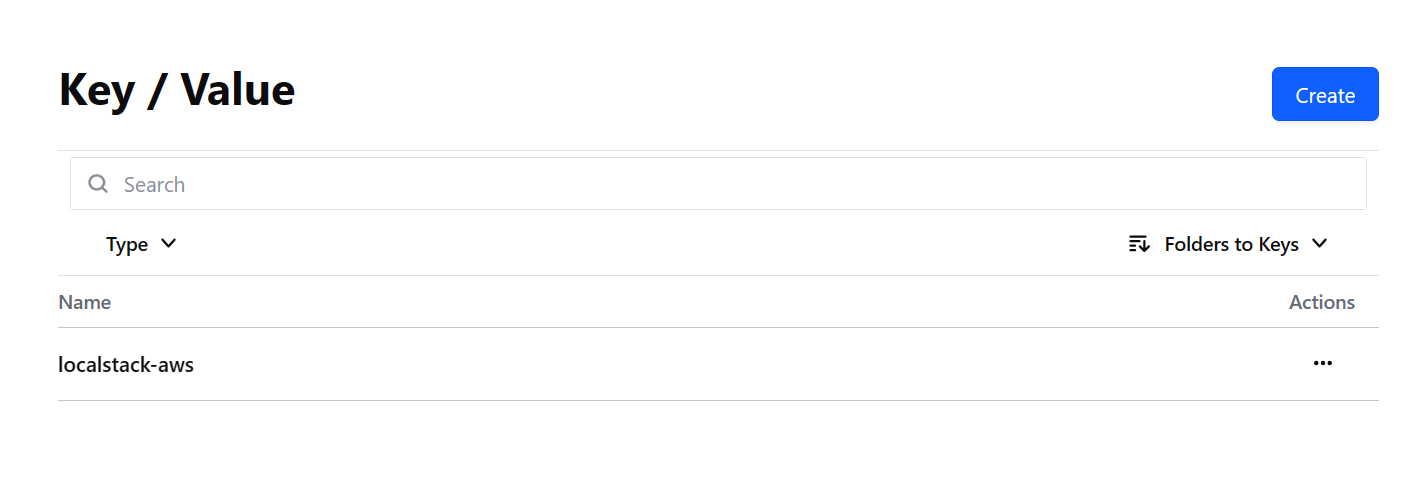
Workspace 允许我们在同一个文件夹内,使用同样的 Backend 配置,但可以维护任意多个彼此隔离的状态文件。还是我们刚才那个使用测试 Consul 服务作为 Backend 的例子:
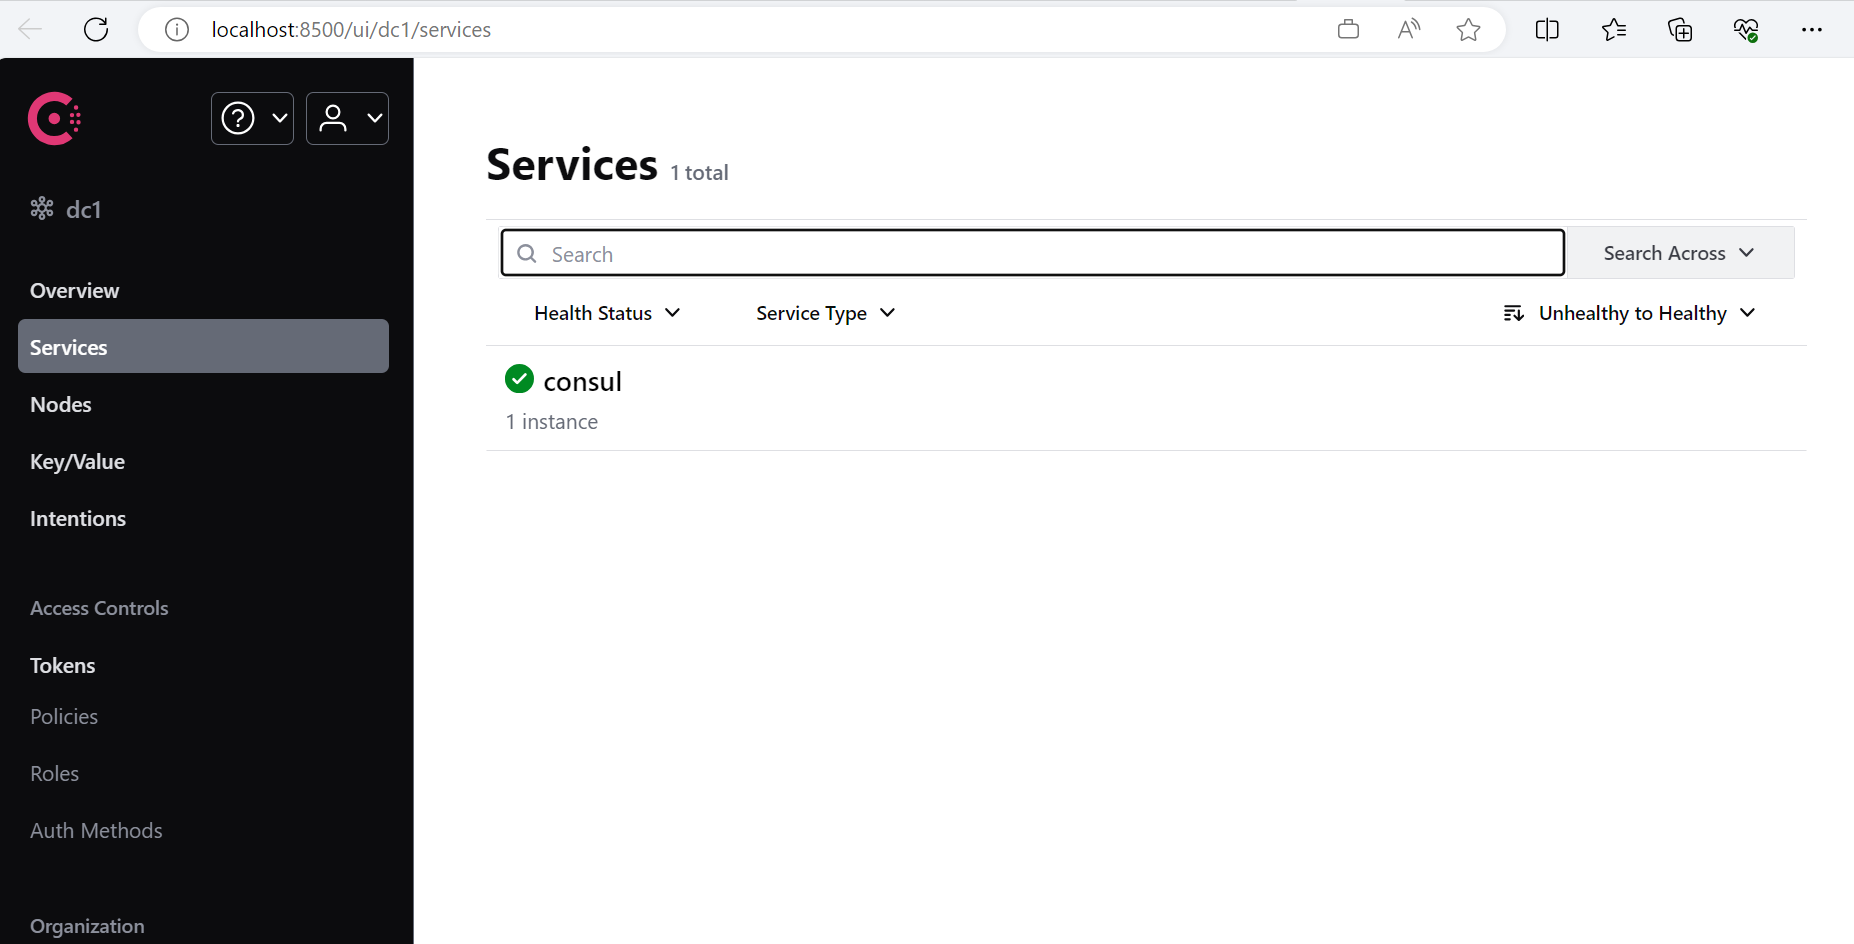
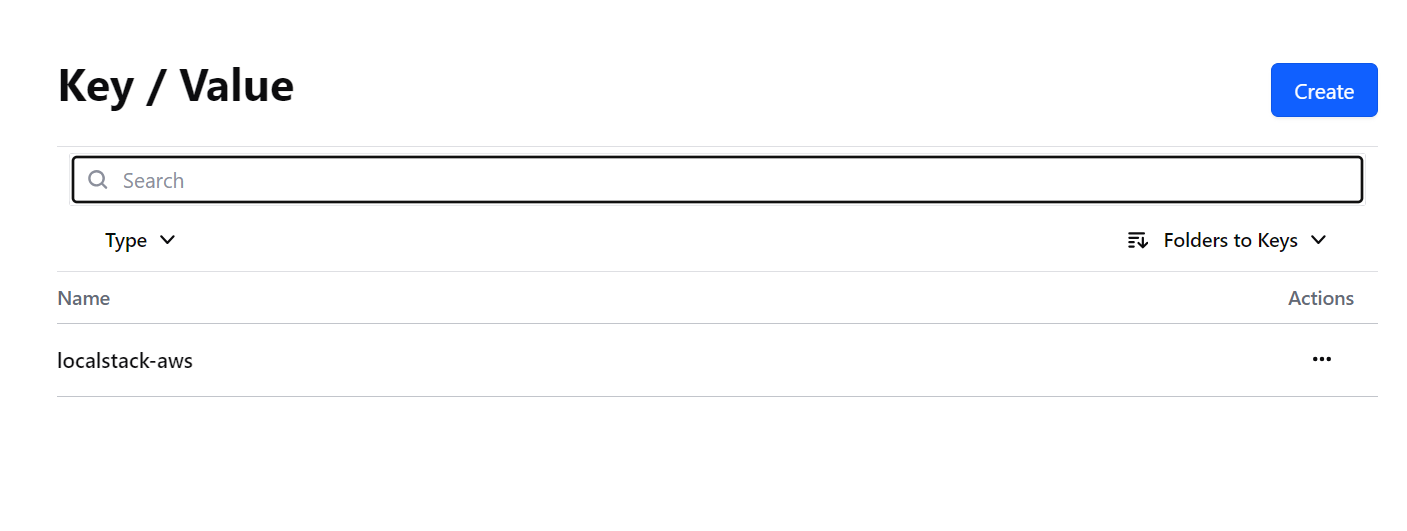
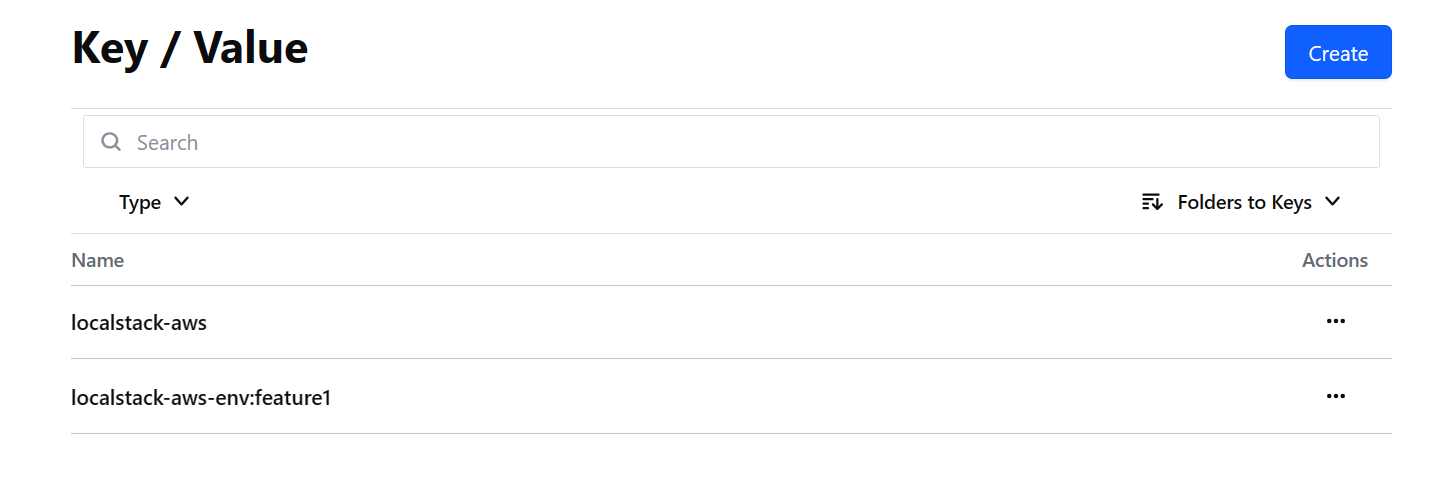
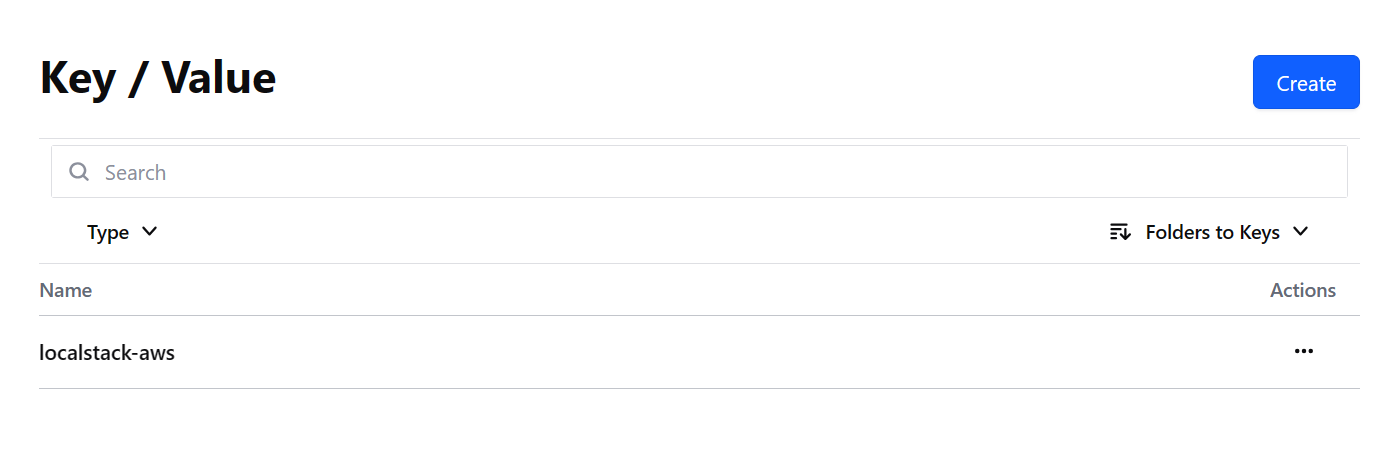
图 1.3.2/12 - 重新访问 Consul,目前有一个键
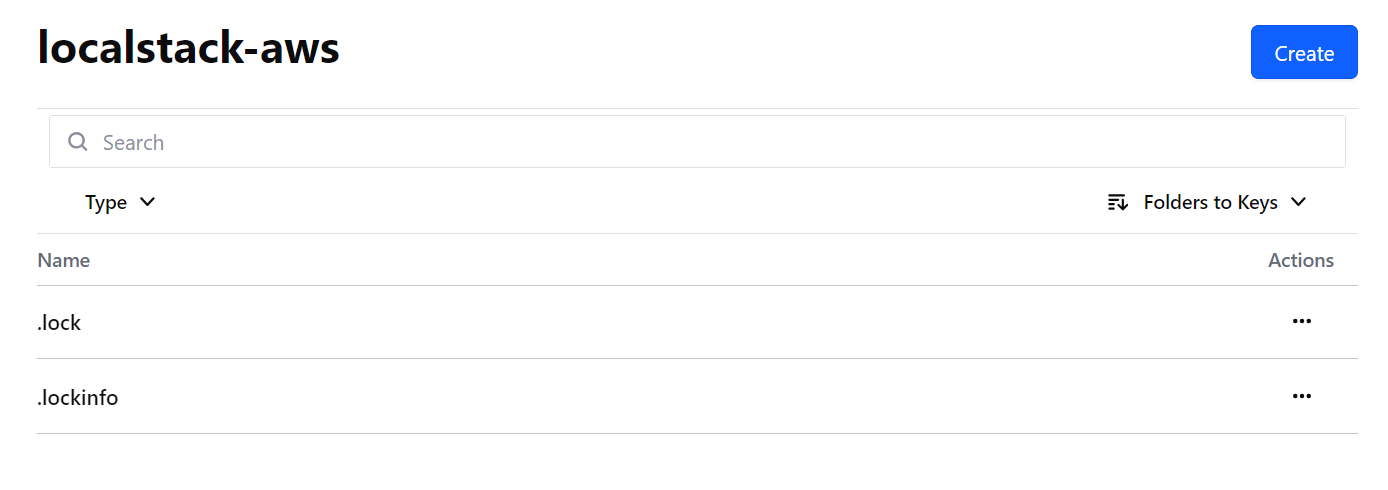
当前我们有一个状态文件,名字是 localstack-aws。然后我们在工作目录下执行这样的命令:
1 2 3 4 5 6
$ terraform workspace new feature1 Created and switched to workspace "feature1"!
You're now on a new, empty workspace. Workspaces isolate their state, so if you run "terraform plan" Terraform will not see any existing state for this configuration.
$ terraform workspace select default Switched to workspace "default".
我们可以用以下命令确认我们成功切换回了 default:
1 2
$ terraform workspace show default
我们可以用以下命令删除 feature1:
1 2 3 4 5 6 7 8 9 10 11 12 13
$ terraform workspace delete feature1 ╷ │ Error: Workspace is not empty │ │ Workspace "feature1" is currently tracking the following resource instances: │ - aws_instance.web │ │ Deleting this workspace would cause Terraform to lose track of any associated remote objects, which would then require you to │ delete them manually outside of Terraform. You should destroy these objects with Terraform before deleting the workspace. │ │ If you want to delete this workspace anyway, and have Terraform forget about these managed objects, use the -force option to │ disable this safety check. ╵
$ terraform workspace delete -force feature1 Deleted workspace "feature1"! WARNING: "feature1" was non-empty. The resources managed by the deleted workspace may still exist, but are no longer manageable by Terraform since the state has been deleted.
provider 块声明了 aws 这个 Provider 所需要的各项配置。在上文的代码示例中,provider "aws"和required_providers中aws = {...}块里的aws,都是 Provider 的 Local Name,一个 Local Name 是在一个模块中对一个 Provider 的唯一的标识。
你可以选择为同一个 Provider 定义多个配置,并且可以根据每个资源或每个模块来选择使用哪一个。这主要是为了支持云平台的多个区域;其他例子包括针对多个 Docker 主机,多个 Consul 主机等。
要为某一个 Provider 创建多个配置,包括具有相同提供者名称的多个 provider 块。对于每个额外的非默认配置,使用 alias 元参数提供额外的名称段。例如:
1 2 3 4 5 6 7 8 9 10 11 12
# The default provider configuration; resources that begin with `aws_` will use # it as the default, and it can be referenced as `aws`. provider "aws" { region = "us-east-1" }
# Additional provider configuration for west coast region; resources can # reference this as `aws.west`. provider "aws" { alias = "west" region = "us-west-2" }